Showing posts with label OSS. Show all posts

Monday, August 20, 2012

Is NuGet the nu DLL hell?

At first I suspected this but after this weekend I'm convinced we're not off the hook. With the RTM release of VS 2012 I decided to try upgrading my Simple Circles project to see how things turned out. VS 2012 was okay - I had played with the RC version a bit - however, the various NuGet packages that had been upgraded since May when I last worked on it were numerous so I started slogging through them.

Several packages had no dependencies and things generally went well. However, the combination of NHibernate, Fluent NHibernate, NHibernate Logging, Common Logging, and Common.Logging.Log4Net (esp. 2.0 which is really 1.2.11 - that's another story) proved too much to bother with. After bumping each of the packages to current versions and checking dependencies my NHibernate unit tests all failed with configuration errors as well as object not found problems.

Don't get me wrong - I like and believe in NuGet as a system and approach. However, it's not a panacea and it doesn't prevent compatibility problems even when so called "dependencies" are met. You still have to test the combinations of software you're using. In my case, I simply reverted to the earlier backup and voila - problems went away. I did take a few minutes of carefully upgrading the packages that weren't related, e.g. jQuery, AutoMapper, etc. while testing each upgrade to ensure nothing broke (hooray for unit tests!). I'll save the gnarly knot of remaining packages for another day when I have more time to unravel the problem.

Sunday, February 19, 2012

Simple Circles–NHibernate Unit Testing (Part 7c)

This post is part of a series on building a simple to use web-based contact and customer relationship management application. The goal is to support various audiences including businesses, teams, clubs, religious organizations, etc.

In Part 7a I implemented the Repository pattern using NHibernate and in Part 7b I used Fluent NHibernate to implement the Data Mapper pattern between the domain layer and the relational database layer. In this post I’ll build unit tests to exercise these implementations.

One of the problems with attempting to test a data access strategy is ensuring the database is in a known state at the start of each test. Previously I’ve used teardown and setup SQL scripts to empty out data and preload initial values in a database instance. That approach is tedious because it means maintaining two sets of scripts in a different syntax (SQL instead of C#) and using a different toolset (SSMS). Another approach that’s becoming more popular and prevalent is to use a lighter footprint database engine capable of running in-memory. In fact, Fluent NHibernate makes this easy with its standard configuration – all it takes is setting up an NHibernate session configured to use the in-memory database as shown here:

SessionFactory Class
namespace Circles.NHibernateTests
{
  using Circles.NHibernateRepository;

  using FluentNHibernate.Cfg;
  using FluentNHibernate.Cfg.Db;

  using NHibernate;
  using NHibernate.Cfg;
  using NHibernate.Tool.hbm2ddl;

  public class SessionFactory
  {
    private static Configuration staticConfig;

    public static ISessionFactory CreateSessionFactory()
    {
      return
        Fluently.Configure()
          .Database(SQLiteConfiguration.Standard.InMemory().ShowSql())
          .Mappings(m => m.FluentMappings.AddFromAssemblyOf<PartyRepository>().ExportTo(System.Console.Out))
          .ExposeConfiguration((c) => staticConfig = c)
          .BuildSessionFactory();
    }

    public static void BuildSchema(ISession session)
    {
      var export = new SchemaExport(staticConfig);
      export.Execute(script: true, export: true, justDrop: false, connection: session.Connection, exportOutput: null);
    }
  }
}
Lines 20-22 contain all the “magic”: line 20 configures the database to use the standard in-memory configuration for SQLite. Line 21 sets up the mappings to be read from the PartyRepository assembly; in addition, the ExportTo() method call will dump the generated hbm.xml to the console. Line 22 exposes the configuration being set up before it is passed to NHibernate for session creation. In this case, the Lambda expression stores the newly built configuration in a static variable for later reuse by the BuildSchema method.

xUnit does not implement or use constructs such as [Setup] / [Teardown] like nUnit does or [TestInitialize] / [TestCleanup] like MSTest does since the authors feel it is problematic. You can read more about the rational on James Newkirk’s blog post “Why you should not use Setup and TearDown in NUnit”. Pretty compelling when the main author himself tells you not to; however, I’m going to bend the rules a little. I’ve implemented a base testing class that contains a virtual method called TestInitialize() whose purpose is to prepare the testing database and put it in a known state before each test is executed:

TestBase Class
namespace Circles.NHibernateTests
{
  using NHibernate;

  /// <summary>
  /// Base class for NHibernate / SQLite tests
  /// </summary>
  public abstract class TestBase
  {
    protected static readonly object LockObject = new object();

    private static ISessionFactory sessionFactory;

    protected ISession Session { get; set; }

    /// <summary>
    /// Code to run before the test to allocate 
    /// and configure any resources needed.
    /// </summary>
    public virtual void TestInitialize()
    {
      sessionFactory = SessionFactory.CreateSessionFactory();
      Session = sessionFactory.OpenSession();
      SessionFactory.BuildSchema(Session);
    }

    public void Dispose()
    {
      Session.Dispose();
    }
  }
}

Each test class can now easily prepare an in-memory database and place it in a known state prior to executing tests by overriding TestInitialize() with its own specific behavior:

TestInitialize() Method
public override void TestInitialize()
{
  Monitor.Enter(LockObject);

  base.TestInitialize();

  using (var tx = Session.BeginTransaction())
  {
    var householdType = new PartyType(new Guid(Constants.PartyTypeIdHousehold))
    {
      TypeName = "Household"
    };
    Session.Save(householdType);

    var personType = new PartyType(new Guid(Constants.PartyTypeIdPerson))
    {
      TypeName = "Person"
    };
    Session.Save(personType);

    var person = new Person
    {
      FirstName = "Nancy",
      LastName = "Davolio",
      Gender = GenderEnum.Female,
      Birthday = new DateTime(1948, 12, 8),
      PartyType = personType
    };
    Session.Save(person);

    Session.Flush();
    tx.Commit();
  }

  Session.Clear();

  Monitor.Exit(LockObject);
}

The Monitor.Enter and Monitor.Exit calls (lines 3 & 38) ensure that access to the NHibernate Session remains serialized and two test methods can’t accidently interfere with each other in multi-threaded harnesses. The first call is to the base class’ implementation which creates the in-memory database. Following that I create PartyType instances for Household and Person and then create and persist a well-known Person instance.

With the base class and SessionFactory implemented and in place, constructing unit tests that can exercise (indirectly) the mappings as well as an actual, deployed database layer becomes trivial:

CanAddHousehold() Test Method
[Fact]
public void CanAddHousehold()
{
  this.TestInitialize();

  IPartyRepository repository;
  Household household;

  // arrange
  using (var tx = Session.BeginTransaction())
  {
    repository = new PartyRepository(Session);
    var partyType = repository.FindPartyTypeById(new Guid(Constants.PartyTypeIdHousehold));

    // act
    household = new Household
    {
      PartyName = "Eisenhower",
      FormalGreeting = "President Dwight D. and Mrs. Mamie",
      InformalGreeting = "Ike and Mamie",
      PartyType = partyType
    };

    repository.Add(household);
    tx.Commit();
  }

  // assert
  Assert.NotNull(household);
  Assert.NotNull(repository.FindById(household.PartyId));
}

Line 4 initializes the database including preparing the known state, Line 12 initializes a PartyRepository instance using the in-memory database session. This particular line of code deserves special attention – I’m creating a PartyRepository and giving it the in-memory database to operate against. Recall in Part 7a on Line 47 of the fourth code fragment (DBSession class)  that a PartyRepository instance was created using the “real” NHibernate DbSession there. Here’s where designing the NHibernate repository to accept an ISession implementation gives flexibility.

Line 13 retrieves the household party type that is known to be there because it was created and saved during TestInitialize(). Finally the household is created and saved. An interesting side effect of this test was when I first ran it – it failed. I had forgotten to specify/assign a PartyType to the household instance. When I referred back to the earlier tests that I put together using the FakeRepository I realized that it too wasn’t assigning or checking the party type. This oversight illustrates a problem with trying to fake or mock an implementation – you have to remember to code and test all the validation and business rules necessary to be a “real” repository. This is the best reason to have taken these steps of setting up a reusable, fast way to test the real repository – as you code the repository, you can test it without having to write double the code by updating the fake one.

This discovery led to adding a negative test to ensure the repository doesn’t allow a household without a party type:

Negative Test
[Fact]
public void CanNotAddHouseholdWithMissingPartyType()
{
  this.TestInitialize();

  // arrange
  using (var tx = Session.BeginTransaction())
  {
    var repository = new PartyRepository(Session);

    // act
    var household = new Household
    {
      PartyName = "Eisenhower",
      FormalGreeting = "President Dwight D. and Mrs. Mamie",
      InformalGreeting = "Ike and Mamie",
      /* PartyType = partyType */
    };

    // assert
    Assert.Throws<NHibernate.PropertyValueException>(
      delegate
      {
        repository.Add(household);
      });

    tx.Rollback();
  }
}

Lines 21-25 uses the xUnit Assert.Throws<> method to wrap the attempt to add a household without a party type. If the repository doesn’t throw an NHibernate.PropertyValueException then the test is considered to have failed.

This post was pretty densely packed with concepts - an entire framework for testing an NHibernate-based data layer. The accompanying code base is growing larger and can be downloaded from here.

Friday, February 3, 2012

Simple Circles–NHibernate Mapping (Part 7b)

This post is part of a series on building a simple to use web-based contact and customer relationship management application. The goal is to support various audiences including businesses, teams, clubs, religious organizations, etc.
In a previous post, I used AutoMapper to implement the DataMapper pattern to map and flatten the domain model into view models for the MVC user interface. The same approach applies to mapping the domain model to a relational database. In fact, this is the heart of an object-relational mapping (ORM) tool like NHibernate. Originally, NHibernate used XML-based mapping files similar to its Hibernate lineage. More recently, James Gregory’s Fluent NHibernate tool has emerged as a leading alternative with strengths such as supporting the fluent interface programming style, convention-based mappings, and compile-time checking (a huge time saver).
Simple Circles - Install FluentNHibernateAfter adding Fluent NHibernate v1.2.0.712 – that version is compiled against the NHibernate version I’m using – I created a \Maps folder and created the mapping classes. Before diving into the mapping, it’s time to introduce a best practice for managing concurrency and allowing detection of stale objects. By convention, NHibernate supports a special-named property called ‘Version’ that can be numeric (preferred), a timestamp or a DB timestamp. You can find more information at the NHibernate site or Ayende’s post. In the Circles data model, I’ve got a base Entity class which is a great place to put the Version property so every Entity automatically gets the benefit of optimistic concurrency checking. Here's the mappings for Party and PartyType:
namespace Circles.NHibernateRepository.Maps
{
  using Circles.Domain;

  using FluentNHibernate.Mapping;

  public class PartyMap : ClassMap<Party>
  {
    public PartyMap()
    {
      Id(x => x.PartyId).GeneratedBy.GuidComb();
      Version(x => x.Version);
      References(x => x.PartyType, "TypeId")
          .Not.Nullable();
      Map(x => x.PartyName)
          .Not.Nullable()
          .Length(255)
          .Index("ukPartyName");
    }
  }

  public class PartyTypeMap : ClassMap<PartyType>
  {
    public PartyTypeMap()
    {
      Id(x => x.TypeId).GeneratedBy.GuidComb();
      Version(x => x.Version);
      Map(x => x.TypeName)
          .Not.Nullable()
          .Length(255)
          .Index("ukTypeName");
    }
  }
}

Line #11 above maps the Id property to a column called PartyId and specifies that the Guid.Comb Identifier Strategy be used to generate new ids. Lines #12 and #13 map the referenced PartyType within a Party by creating a foreign key using TypeId as the column name.

Fluent NHibernate has the ability to not only define mappings but to configure NHibernate using the mappings along with other settings you specify. Using this ability, its also possible to export the configuration to .hbm.xml files combined with NHibernate’s ability to export .hbm files to SQL DDL. There’s a lot of power packed into the following:
namespace NHibernateSchemaExport
{
  using Circles.NHibernateRepository;

  using FluentNHibernate.Cfg;
  using FluentNHibernate.Cfg.Db;

  using NHibernate.Cfg;
  using NHibernate.Tool.hbm2ddl;

  class Program
  {
    static void Main(string[] args)
    {
      Fluently.Configure()
        .Database(SQLiteConfiguration.Standard
            .ConnectionString(c => c.FromConnectionStringWithKey("circlesdb"))
            .ShowSql)
        .Mappings(m => m.FluentMappings.AddFromAssemblyOf()
            .ExportTo("."))
        .ExposeConfiguration(BuildSchema)
        .BuildSessionFactory();
    }

    static void BuildSchema(Configuration cfg)
    {
      new SchemaExport(cfg)
             .SetOutputFile("CirclesSchema.sql")
             .Execute(script: true, export: false, justDrop: false);
    }
  }
}

Line #18 shows the ExportTo() method being using to export the configured mappings to the current directory. Line #19 uses the ExposeConfiguration() method along with NHibernate’s SchemaExport() method on line #26 to output the database schema. These techniques give us the ability to “see into” the dynamically generated hbm and sql files.

There’s more details in the accompanying change set for this post that can be downloaded here. Next up is implementing the PartyRepository now that NHibernate is configured and the domain-to-database mapping is coming together.

Sunday, January 29, 2012

Simple Circles–NHibernate Repository (Part 7a)

This post is part of a series on building a simple to use web-based contact and customer relationship management application. The goal is to support various audiences including businesses, teams, clubs, religious organizations, etc.
I’ve got a decent foundation in place with the domain model, persistence interface defining the repository pattern and a concrete implementation with a fake repository for testing purposes. The fake repository also serves to easily and quickly validate the design – if it is difficult to implement with simple in-memory structures then it’ll likely be even harder using an ORM. I have more experience with NHibernate and it’s a more sophisticated and mature ORM so I’ll start with it first.
To begin with, I’ve added two interfaces to the Persistence class library to define a database session and a factory pattern to manage creating sessions.
namespace Circles.Persistence
{
  using System;
  using System.Data;

  public interface IDbSession : IDisposable
  {
    void BeginTransaction(IsolationLevel isolationLevel);

    void Commit();

    void Rollback();

    IPartyRepository CreatePartyRepository();
  }
}
Bob Cravens provided inspiration for the session work with his Truck Management System. that eventually made it into his own GenericRepository project. This database session interface specifies that concrete implementations provide BeginTransaction, Commit, and Rollback methods as well as a concrete implementation for creating a PartyRepository.
The DbSessionFactory defines the factory pattern with a little bit of flexibility – you can create a DbSession with or without transactional support.
namespace Circles.Persistence
{
  public interface IDbSessionFactory
  {
    IDbSession Create(bool withTransaction);
  }
}
Simple Circles - Install NHibernateNext I created an NHibernateRepository class library project and added the NHibernate package via NuGet. While NuGet makes it simple to install packages and their dependencies, it doesn’t relieve you from managing versions. It is usually best to specify an explicit version when installing packages to ensure you don’t get conflicts and other surprises. In my case I used “-version 3.1.0.4000” which also installs the same version of Iesi.Collections.
The implementation of DbSessionFactory is pretty lightweight and trivial:
namespace Circles.NHibernateRepository
{
  using System.Data;
  using Circles.Persistence;

  public class DbSessionFactory : IDbSessionFactory
  {
    public IDbSession Create(bool withTransaction)
    {
      DbSession session = new DbSession(SessionProvider.SessionFactory);

      if (withTransaction)
      {
        session.BeginTransaction(IsolationLevel.ReadCommitted);
      }

      return session;
    }
  }
}

The SessionProvider class used in line #10 above will be discussed below. DbSession is also lightweight because it delegates the heavy lifting to the underlying NHibernate methods:
namespace Circles.NHibernateRepository
{
  using System;
  using System.Data;
  using Circles.Persistence;
  using NHibernate;

  public class DbSession : IDbSession
  {
    private readonly ISession session;
    private ITransaction transaction;

    public DbSession(ISessionFactory sessionFactory)
    {
      if (sessionFactory == null)
      {
        throw new ArgumentNullException("sessionFactory");
      }

      this.session = sessionFactory.OpenSession();
      this.session.FlushMode = FlushMode.Auto;
    }

    ~DbSession()
    {
      this.Dispose();
    }

    public void Dispose()
    {
      if (this.session == null)
      {
        return;
      }

      lock (this.session)
      {
        if (this.session.IsOpen)
        {
          this.session.Close();
        }
      }

      GC.SuppressFinalize(this);
    }

    public IPartyRepository CreatePartyRepository()
    {
      return new PartyRepository(this.session);
    }

    public void BeginTransaction(IsolationLevel isolationLevel)
    {
      this.transaction = this.session.BeginTransaction(isolationLevel);
    }

    public void Commit()
    {
      if (this.transaction == null)
      {
        return;
      }

      if (!this.transaction.IsActive)
      {
        throw new InvalidOperationException("No active transation");
      }

      this.transaction.Commit();
    }

    public void Rollback()
    {
      if (this.transaction == null)
      {
        return;
      }

      if (this.transaction.IsActive)
      {
        this.transaction.Rollback();
      }
    }
  }
}

NHibernate is highly configurable so instantiating the libraries requires processing configuration settings contained in hibernate.cfg.xml as well as reflecting over your assemblies. Doing so is expensive – its best to cache the initialized configuration and session for the lifetime of the application. The SessionProvider class does this:
namespace Circles.NHibernateRepository
{
  using NHibernate;
  using NHibernate.Cfg;

  public class SessionProvider
  {
    private static Configuration configuration;

    private static ISessionFactory sessionFactory;

    private SessionProvider()
    {
    }

    public static Configuration Configuration
    {
      get
      {
        if (configuration == null)
        {
          configuration = new Configuration();
          configuration.Configure();
          configuration.AddAssembly(typeof(PartyRepository).Assembly);
        }

        return configuration;
      }
    }

    public static ISessionFactory SessionFactory
    {
      get { return sessionFactory 
              ?? (sessionFactory = Configuration.BuildSessionFactory()); }
    }

    public static ISession GetSession()
    {
      return SessionFactory.OpenSession();
    }
  }
}

That’s a lot of implementation and setup plumbing! The source code for this article can be downloaded from here. The next installment will map the domain model to the relational database model.

Sunday, January 22, 2012

Simple Circles–Enabling jQuery UI (Part 6)

This post is part of a series on building a simple to use web-based contact and customer relationship management application. The goal is to support various audiences including businesses, teams, clubs, religious organizations, etc.
I think of the default blue MVC 3 UI as something of a developer’s test version – not really what you’ll go to production with but sufficient to work with while developing. It’s possible to use the ASP.NET MVC themes from their gallery but I think jQuery and its companion jQuery UI provide a much richer and cross-browser solution with far less effort.

Themes

Steve Hobbs wrote a great step-by-step post on enabling jQuery UI last June. Like him, I used the Redmond theme to start with so it more closely resembled the default.
Simple Circles - Enable jQuery UISimple Circles - jQuery UI themeAfter downloading the Redmond theme, copy the css\redmond folder to the Content\themes folder under the Circles website. Remember to choose “Include in Project” from the Solution Explorer (see image to the left). As Steve Hobbs indicates, jQuery UI support is already included in the ASP.NET MVC 3 templates – it just needs to be enabled by adding two lines to the _Layout.cshtml in the Shared folder as shown on the right. To start taking advantage of the jQuery UI theme, simply add the appropriate styles to HTML elements. Here I’ve commented out the standard Submit button on the Create.cshtml page and replaced it with one decorated with jQuery UI CSS classes:
<!--<input type="submit" value="Create" />-->
<input type="submit" value="Create" 
       class="ui-button ui-widget ui-state-default ui-corner-all" 
       role="button" aria-disabled="false">

Simple Circles - jQuery buttonThis screen shot shows the before and after using the Redmond theme just set up. These CSS classes are designed such that switching themes is as easy as deploying a different theme to the Content\themes folder and changing the single <link> line in the _Layout.cshtml page. The “eye candy” is nice – it looks fresher and more modern…well, months ahead of the default hard images the browser displays!

Next I’m going to add some feedback for the user when an action completes. The default behavior when adding, updating or deleting an entity is to perform the action then return the user to the Index page. Breaking this down, it means the controller performs the action then uses RedirectToAction to redirect the browser to the default HTTP GET action. Doing so ensures that the user can’t accidently use refresh to repeat the same action, e.g. adding the same entity twice or, classically, buying the same thing again.

Because redirect is used the current HTTP request ends and another one initiates. This means the feedback message has to be passed across HTTP requests so the usual suspect – ViewData – won’t work. The MVC engineers planned for this with another dictionary object that’s briefly stored in the user’s session – TempData. The MSDN article Passing Data in an ASP.NET MVC Application provides the necessary details. Here I tuck the confirmation message into TempData (line #4) before issuing the redirect:
  ...
  this.repository.Add(entity);

  TempData["message"] = string.Format("{0} was added", entity.PartyName);

  return RedirectToAction("Index");
}

Back in the Index.cshtml the message just passed to it is retrieved and rendered with jQuery UI classes decorating the output:
<h2>People</h2>

@if (TempData["message"] != null) {
  <div style="margin-top: 20px; padding: 0 .7em;" class="ui-state-highlight ui-corner-all"> 
    <p><span style="float: left; margin-right: .3em;" class="ui-icon ui-icon-info"></span>
      @TempData["message"]
    </p>
  </div>
}

Simple Circles - ConfirmationThe result is shown to the right. Another simple feature to take advantage of jQuery’s client-side power is to enable “unobtrusive client-side validation”. There’s plenty of examples already, including the ASP.NET Teams’s own tutorial. Two web.config settings and two more <link> elements to include necessary JavaScript files in _Layout.cshtml and field/form validation moves from server-side down to client-side to provide feedback without having to HTTP POST the form to the server then getting the validation messages sent back to the client browser.

Menu Tabs and Lists

Simple Circles - Tabbed MenuOnce again I’m turning to the ASP.NET team’s tutorials to improve the user experience even more. Their Iteration #2 – Make the application look nice article contains two enhancements; one improves the menu tabs by rounding the corners and providing highlighting to indicate the selected tab the user is on and the other replaces the textual hyperlinks on each row with graphics for edit and delete. Simple Circles - Nicer ListsAgain, rather than duplicating details here, please refer to the article for more information. The result of these efforts is shown on the right.

The source code for this article can be downloaded from here. The next several installments will flesh out concrete implementations of the repository using Entity Framework and NHibernate.

Thursday, January 19, 2012

Simple Circles–MVC Controller Unit Tests (Part 5)

This post is part of a series on building a simple to use web-based contact and customer relationship management application. The goal is to support various audiences including businesses, teams, clubs, religious organizations, etc.

Simple Circles - ControllerTestsIn the last post I left off with the PeopleController refactored to use an IPartyRepository via dependency injection. Now I’ll create unit tests for the controller so that we’ll know if something breaks as the solution evolves. Since I’m planning on several views and controllers, I added a ControllerTests folder to the UnitTests project to organize and group them together. With xUnit, as with many unit testing frameworks, simply add a new class called PeopleControllerTest and begin writing the tests.

Unit testing MVC controllers generally falls into two categories:
  1. Ensuring that an action result being returned from a controller’s action is correct. On HTTP GET requests, this means the correct view result is returned.
  2. Ensuring that HTTP POSTs are behaving properly:
    1. A POST with purposely invalid model data causes it to route the request back to the originating view.
    2. A POST with correct model data causes it to route back to the Index view.
Because of the dependency injection work just done, setting up the unit test is straightforward:
[Fact]
public void DefaultGetReturnsIndexView()
{
// arrange
const string ExpectedViewName = "Index";
var peopleController =
new PeopleController(new FakeRepository.FakePartyRepository());

// act
var viewResult = peopleController.Index();

// assert
Assert.NotNull(viewResult);
Assert.Equal(ExpectedViewName, viewResult.ViewName);
var model = viewResult.ViewData.Model as IEnumerable;
Assert.NotNull(model);
}

Notice on Line #6 above that it’s easy to pass a new instance of the FakeRepository from the test method. The assertions section checks that a view result was returned, that it was the expected named view result and that the view’s model is present.


Testing the HTTP POST actions is a bit more involved. The basic test is the same however since the testing class is calling the controller directly a little more work is needed. Model validation is a part of the MVC runtime which is not present during testing so it is necessary to “prime the pump” so to speak by placing the error into the controller’s ModelState to see if it’s being handled correctly – this is essentially the same behavior the MVC runtime exhibits:

[Fact]
public void CreatePostReturnsViewIfModelStateIsInvalid()
{
// arrange
const string ExpectedViewName = "Create";
var peopleController
= new PeopleController(new FakeRepository.FakePartyRepository());
peopleController.ModelState.AddModelError("LastName", "LastName is required.");
var person = new Person
{
FirstName = "Henry",
MiddleName = "Lewis",
//LastName = "Stimson ",
Gender = Enum.GetName(typeof(GenderEnum), GenderEnum.Male),
Birthday = new DateTime(1867, 9, 21)
};

// act
var viewResult = peopleController.Create(person) as ViewResult;

// assert
Assert.NotNull(viewResult);
Assert.Equal(ExpectedViewName, viewResult.ViewName);
}

Line #8 above is where the error is set up. Lines #9 through #16 create a Person instance to pass to the controller method to mimic what the MVC runtime will do. Notice that I commented out the line for setting the LastName property for authenticity purposes. Personally, I would hate to come across some else’s code that sets up an error yet passes in perfectly valid data. Finally, the assert statements check that the same Create view is returned indicating that the error(s) were detected and handled properly.

Testing for a valid model is nearly the same – just don’t set the ModelState, pass a valid Person instance and check that we’re returned to the Index page. Edit, update and delete actions are nearly identical as well.


The final bit of code worthy of mention is around the use of AutoMapper – remember that the last post introduced AutoMapper as an implementation of the DataMapper pattern. I wired up the mapping initialization inside Global.asax.cs then. Of course the test harness doesn’t have a website since it’s job is exercising the logic and behavior of the controller classes. Therefore I have to use the xUnit way of introducing a “fixture” necessary for the test class to operate.

public class PeopleControllerTest : IUseFixture<DataMapperFixture>
{
public void SetFixture(DataMapperFixture data)
{
data.CreateMaps();
}
...
}
...
public class DataMapperFixture : IDisposable
{
public void CreateMaps()
{
Mapper.AssertConfigurationIsValid();
PersonMap.CreateMaps();
}
}

The test class implements the xUnit IUseFixture<T> interface which tells the xUnit runtime that it needs to call SetFixture with an instance of that type – in my case I created a trivial DataMapperFixture class that simply verifies the mapping is valid and calls the PersonMap.CreateMaps() method to initialize AutoMapper.


The source code for this article can be downloaded from here. The next installment will explore some simple jQuery enhancements to make the UI a little nicer and more informative.

Sunday, January 15, 2012

Simple Circles–Add an ASP.NET MVC 3 UI (Part 4b)

This post is part of a series on building a simple to use web-based contact and customer relationship management application. The goal is to support various audiences including businesses, teams, clubs, religious organizations, etc.
Simple Circles - Ninject packageIn the last post I left off with a scaffolded People MVC implementation that was hard-wired to use the Entity Framework 4 data access technology. In this post I’m going to replace that with the Ninject dependency-injection framework and use the previously built FakePartyRepository implementation to begin testing the UI quickly.
With NuGet, adding Ninject support is easy – just two simple commands: ‘Install-Package Ninject -Version 2.2.1.4’ and ‘Install-Package Ninject.MVC3 -Version 2.2.2.0’. I chose to include specific versions since they were specified on the corresponding NuGet Gallery pages. Once again there is a lot going on behind the scene as shown to the right.
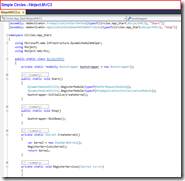
Simple Circles - Ninject.MVC3The Ninject.MVC3 extension was created to add support to MVC 3 applications including DI for Controllers, filters, validators and the Unit of Work pattern for NHibernate (more on this later!). The NuGet version adds a class to the \App_Start folder called NinjectMVC3 wired and ready to go. It does so by hooking in with the WebActivator project – one of the dependencies automatically installed when the Ninject.MVC3 package was installed.

Controller

First I’ll add references to the Domain and Persistence projects to bring in their type definitions then I’ll replace the EF context reference in PeopleController with the IPartyRepository instead. Refer to the last screenshot in the previous post to see the boilerplate code generated by the scaffolding.
public class PeopleController : Controller
{
  private readonly IPartyRepository repository;

  public PeopleController(IPartyRepository repository)
  {
    this.repository = repository;
  }

  public ViewResult Index()
  {
    IEnumerable<Domain.Person> persons = this.repository.FindAllPersons();
    return View(persons);
  }
  ...

The problem with the above code is that it will not compile because of line 13 – ‘return View(persons)’. The MVC convention is to use separate model classes in the presentation layer to decouple it from the business/domain layer. I did exactly this when creating a Person class in the \Models folder - essentially flattening the EntityBase->Entity->Party->Person inheritance hierarchy to just Person. The scaffolding constructed the views (Index, Details, Edit, etc.) to work with the Models.Person class – not the Domain.Person. Line 12 is returning an enumeration of Domain.Person instances whereas the view expects Models.Person instances.

Data Mapper


The solution to this mismatch lies in another tool called AutoMapper which makes using the Data Mapper pattern a cinch. Jeremy Miller’s MSDN article Persistence Patterns gives a good overview of how these various proven patterns fit and work together. Also, Jimmy Bogard wrote a series of articles on his tool at Los Techies. Back to the NuGet Package Manager console to ‘Install-Package AutoMapper’.

I created a \Maps folder and added a new class called PersonMap to define the mapping back and forth between the two models…
internal class PersonMap
{
  internal static void CreateMaps()
  {
    Mapper.CreateMap<Domain.Person, Models.Person>()
        .ForMember(dest => dest.Birthday, opt => opt.MapFrom(src => src.Birthday))
        .ForMember(dest => dest.FirstName, opt => opt.MapFrom(src => src.FirstName))
      ...
        .ForMember(dest => dest.PersonId, opt => opt.MapFrom(src => src.PartyId))
        .ForMember(dest => dest.FullName, opt => opt.MapFrom(src => src.PartyName))
        .ForMember(dest => dest.Salutation, opt => opt.MapFrom(src => src.Salutation ?? null))
        .ForMember(dest => dest.Suffix, opt => opt.MapFrom(src => src.Suffix ?? null));

    Mapper.CreateMap<Models.Person, Domain.Person>()
        .ForMember(dest => dest.ChannelAddresses, opt => opt.Ignore())
        .ForMember(dest => dest.Birthday, opt => opt.MapFrom(src => src.Birthday))
        .ForMember(dest => dest.FirstName, opt => opt.MapFrom(src => src.FirstName))
      ...
        .ForMember(dest => dest.PartyId, opt => opt.MapFrom(src => src.PersonId))
        .ForMember(dest => dest.PartyName, opt => opt.Ignore())
        .ForMember(dest => dest.PartyType, opt => opt.Ignore())
        .ForMember(dest => dest.PostalAddresses, opt => opt.Ignore())
        .ForMember(dest => dest.Salutation, opt => opt.MapFrom(src => src.Salutation ?? null))
        .ForMember(dest => dest.Suffix, opt => opt.MapFrom(src => src.Suffix ?? null));
  }
}
A few things are worth pointing out in the above listing:

  1. Line #9 shows how I map the generic, internal PartyId from the domain model to the more friendly and meaningful PersonId in the MVC layer.
  2. Line #10 does the same for the PartyName - mapping it to a FullName property.
  3. Line #15 tells the mapper to ignore the ChannelAddress property in the domain model – it will not be mapped to the MVC layer. The same goes for PostalAddresses  –  these will be dealt with later and in a manner appropriate for the user interface.
  4. Lines #11, #12, #23, #24 show how optional fields are handled.

A call to PersonMap.CreateMaps() in Global.asax.cs will initialize the maps when the website starts up. To use the maps, add a line to invoke the data mapping like this:
[HttpPost]
public ActionResult Create(Person person)
{
  if (!ModelState.IsValid)
  {
    return View(person);
  }

  var entity = Mapper.Map<Person, Domain.Person>(person);

  this.repository.Add(entity);

  return RedirectToAction("Index");
}

Line #9 is the magic – transferring the contents of the MVC Models.Person to the Domain.Person before passing to the repository to store.

Dependency Injection


The PeopleController at the top of this article used constructor injection on Line #5 to receive an IPartyRepository instance. Following the Ninject samples and documentation, I’ve added a \Services\ServicesModule which inherits from NinjectModule to handle the injection of services:
/// <summary>
/// A Ninject module to bind services.
/// </summary>
public class ServicesModule : NinjectModule
{
  /// <summary>
  /// Called when the module loads into the kernel.
  /// </summary>
  public override void Load()
  {
    this.Bind<IPartyRepository>()
        .To<FakePartyRepository>()
        .InRequestScope();
  }
}

To wire up the module, add a line to the RegisterServices method found in NinjectMVC3:
private static void RegisterServices(IKernel kernel)
{
  kernel.Load<Services.ServicesModule>();
}

The end result of this effort is that I can now browse and display the list of persons as shown here:

Simple Circles - MVC with Fake Repo

Next time I’ll set up a unit test to exercise the functionality of the controller through injection so that I won’t have to always manually hit every view/page to see if it still works as changes are made.

The source code for this article can be downloaded from here.

Wednesday, January 11, 2012

Simple Circles–Add an ASP.NET MVC 3 UI (Part 4a)

This post is part of a series on building a simple to use web-based contact and customer relationship management application. The goal is to support various audiences including businesses, teams, clubs, religious organizations, etc.
Last time I left off with a working fake implementation of the IPartyRepository called FakePartyRepository. We know that it is “working” because of the unit tests project that exercised the various methods of the contract. Since I have a working repository I’m going to start building out an ASP.NET MVC 3 website that will use the repository. My experience is that doing so earlier in the development cycle rather than later will flush out any problems or misaligned requirements. Remember, to this point I’ve been operating in something of a vacuum – building interfaces and implementations according to a vague vision of consuming them. Now I will make that vision concrete by constructing a user interface to work with.

Setup

Using the New Project wizard, I added an ASP.NET MVC 3 website and chose “Internet Application” for the template with Razor as the view engine. I did not elect to create unit tests as I’m using xUnit and the template support is not worth setting up according to this discussion post. At this point pressing <F5> will bring up the default empty website.
Simple Circles - MVC ScaffoldingI’m a big fan of Steve Sanderson’s Pro ASP.NET MVC Framework books as well as his work on the MVC Scaffolding project which I started using last January as soon as he began publishing it. Therefore, I’m going to draw on his work to move things along quickly. First, I installed the scaffolding project using ‘install-package mvcscaffolding’ which in turn brought in several dependencies as shown on the right.
I’ll also start off simple by using SQL Server Compact 4.0 along with the new ASP.NET Universal Providers 1.01. You can follow Scott Hanselman’s or Scott Guthrie’s posts on setting it up.

Person

MVC Scaffolding works off a model so first I added a Person class to the Models folder…
namespace Circles.Models
{
  using System;
  using System.ComponentModel.DataAnnotations;

  /// <summary>
  /// Represents a view model of a Person
  /// </summary>
  public class Person
  {
    /// <summary>
    /// Default constructor
    /// </summary>
    /// <remarks>Ensure Gender has a default value.</remarks>
    public Person()
    {
      this.Gender = "Unknown";
    }

    [Display(Name = "Person Id")]
    [Key]
    public Guid PersonId { get; set; }

    [Display(Name = "Full name")]
    public string FullName { get; set; }

    // [Required]
    [Display(Name = "Salutation")]
    [StringLength(20)]
    public string Salutation { get; set; }

    [Required]
    [Display(Name = "First name")]
    [StringLength(50, MinimumLength = 3)]
    public string FirstName { get; set; }
  ...

Simple Circles - Scaffold PersonNow with a single NuGet instruction I scaffold a full CRUD interface for the model class using ‘scaffold controller PeopleController -ModelType Circles.Models.Person’ as shown to the right. This one command generated an MVC controller class complete with all behaviors as well as a set of six Razor pages (Index to list, Details, Edit, Create, Delete, and a shared _CreateorEdit) to support CRUD behavior for a Person instance. As the second image shows, quite a bit of code was generated.Simple Circles - Scaffolded Code

I can’t say enough about how exceedingly cool Steve’s scaffolding work is and how much effort it saves. Unfortunately, the current implementation is built to support Entity Framework as the underlying data technology. Notice the CirclesContext class added to the Models folder and the reference to that context embedded in the PeopleController class. While the hooks are there to plug in other scaffolding templates (e.g. NHibernate) as of yet nobody has stepped forward to provide implementations.

You could also, as Steve suggests, add the Entity Framework 4.1 Code First capability via ‘install-package EFCodeFirst.SqlServerCompact’ then regenerate the controller with the additional flags ‘-Repository –Force’. You’d then have a working repository-based implementation built with all Microsoft products.

In the second part of this installment I’ll take a different approach and wire in Ninject as the dependency injection framework then use it to inject the FakePartyRepository previously built.

The source code for this article can be downloaded from here.

Monday, January 9, 2012

Simple Circles–Fake Repository (Part 3)

This post is part of a series on building a simple to use web-based contact and customer relationship management application. The goal is to support various audiences including businesses, teams, clubs, religious organizations, etc. With a basic structure for the domain objects taking shape it’s time to move on to the notion of persistence.

In the last post I set up the interfaces to support the Repository pattern and left off with the following signature:

namespace Circles.Persistence
{
using System;
using System.Linq;

public interface IPartyRepository : IRepository<Party, Guid>, ISupportSave<Party, Guid>, ISupportDelete<Party, Guid>
{
IQueryable<Household> FindAllHouseholds();
IQueryable<Organization> FindAllOrganizations();
IQueryable<Person> FindAllPersons();
}

Now I’m going to put together a simple fake repository implementation to exercise the interfaces as well as quickly provide sample data to work with. I’ve added a new project called FakeRepository containing a single class called FakePartyRepository partly shown here:

namespace Circles.FakeRepository
{
using System;
using System.Collections.Generic;
using System.Linq;

public class FakePartyRepository : IPartyRepository
{
private readonly List<Household> fakeHouseholdList = new List<Household>
{
new Household { PartyName = "Churchill", FormalGreeting = "Sir Winston and Lady Clementine" },
new Household { PartyName = "Roosevelt", FormalGreeting = "President Franklin and Mrs. Eleanor" },
};

private readonly List<Organization> fakeOrganizationList = new List<Organization>
{
new Organization { PartyName = "Great Lakes Food Market" },
new Organization { PartyName = "Hungry Coyote Import Store" },
new Organization { PartyName = "Lazy K Kountry Store" },
};

private readonly List<Person> fakePersonList = new List<Person>
{
new Person { FirstName = "Nancy", LastName = "Davolio", Gender = GenderEnum.Female, Birthday = new DateTime(1948, 12, 8) },
new Person { FirstName = "Andrew", LastName = "Fuller", Gender = GenderEnum.Male, Birthday = new DateTime(1992, 8, 14) },
};

private readonly IQueryable<Household> fakeHouseholdRepository;
private readonly IQueryable<Organization> fakeOrganizationRepository;
private readonly IQueryable<Person> fakePersonRepository;
private readonly IQueryable<Party> fakePartyRepository;

public FakePartyRepository()
{
this.fakeHouseholdRepository = this.fakeHouseholdList.AsQueryable();
this.fakeOrganizationRepository = this.fakeOrganizationList.AsQueryable();
this.fakePersonRepository = this.fakePersonList.AsQueryable();
this.fakePartyRepository = this.fakeOrganizationList.Union(this.fakePersonList).Union(this.fakeHouseholdList).AsQueryable();
}

public IQueryable<Party> FindAll()
{
return this.fakePartyRepository;
}

public Party FindById(Guid id)
{
return this.fakePartyRepository.FirstOrDefault(x => x.PartyId == id);
}
}

As you can see, the underlying data is contained in simple in-memory generic Lists that are wrapped into LINQ IQueryable objects. Note the last line of the constructor where the fakePartyRepository is a .Union of the three underlying lists.


Simple Circles - xunitTo test the FakeRepository let’s add another class library project called UnitTests. We’ll use NuGet to add the xUnit package with the command ‘install-package xunit’ as shown to the right. xUnit was created by James Newkirk (creator of the venerable NUnit) and Brad Wilson to better reflect the purpose of driving and iterating the design of an implementation at the unit level. Brad discusses this philosophy in his article Its not TDD, It’s Design by Example. After adding the xUnit reference, add a class called PartyRepositoryTest:

  public class PartyRepositoryTest
{
[Fact]
public void CanAddHousehold()
{
// arrange
IPartyRepository repository = new FakePartyRepository();

// act
var id = repository.Add(new Household
{
PartyName = "Eisenhower",
FormalGreeting = "President Dwight D. and Mrs. Mamie",
InformalGreeting = "Ike and Mamie"
});

// assert
Assert.NotNull(id);
Assert.NotNull(repository.FindById(id));
}
}

The first thing you may notice is that xUnit uses the attribute [Fact] rather than [Test] as other TDD frameworks do. As Brad puts it “a [Fact] is an expression of some condition which is invariant”. Essentially we’re saying that the condition “CanAddHousehold” is an invariant condition of the PartyRepository which must always be true. In addition to expressing facts, xUnit lets you express theories which are “an expression of a condition which is only necessarily true for the given set of data.”:

  [Theory,
InlineData("D28AA45E-C650-4121-8070-3D12BE31F91A")]
public void CanFindSinglePerson(string id)
{
// arrange
IPartyRepository repository = new FakePartyRepository();
var partyId = new Guid(id);

// act
var person = repository.FindById(partyId) as Person;

// assert
Assert.NotNull(person);
Assert.True(person.Id == partyId);
}

Simple Circles - Unit TestsSince we built the FakeRepository with our known data, we can construct tests with known values to prove the repository is working as designed without defects. In the above example, we know the PartyId of one of the person instances that we put into the fake repository so we can attempt to retrieve that person to exercise that logic. ReSharper’s test runner shows all the tests we currently have. Before the tests can be compiled and run, you must add a reference to the Extensions subproject of xUnit which holds the [Theory] attribute definition and behavior. Once again, use the NuGet Package Manager Console to execute the command “install-package xunit.extensions”.


Finally, you’ll notice in the above samples as well as the source code accompanying this post that I’ve followed the “3A” or “Arrange-Act-Assert” principle for writing the tests.


The source code for this article can be downloaded from here.


Next we’ll look at starting an ASP.NET MVC 3 website to consume and present the domain model.

Sunday, January 1, 2012

Simple Circles–Introduction

This series will be a step-by-step approach on building a simple to use web-based contact and customer relationship management application. The goals are to employ current best practices including domain-driven design (DDD), object-relational mapping (ORM), unit testing – a component of Test-Driven Development (TDD), and the model-view-controller paradigm of ASP.NET MVC3. Additionally, as the name suggests – the finished product must be simple to use. While patterns, practices and techniques employed to build the application might be advanced the end user mustn't be overwhelmed. Keeping track of a circle of friends, acquaintances and associates should be simple!
There are numerous examples of using these practices and technologies around the Internet. However many are overly simplified – designed to show a particular technique – rather than a complete “real world” example. Technical books tend to stick to the Microsoft mantra of always using their latest offering or their shiny new version of some proven OSS product. For example, Steve Sanderson’s Sports Store in Pro ASP.NET MVC 3 Framework and Tim McCarthy’s SmartCA in .NET Domain-Drive Design with C# both deliver complete examples yet neither tackle NHibernate. That is, true persistence ignorance beyond the theory that its possible. Don’t misunderstand, I’m not saying they’re bad books – I’ve bought both, used them to learn, and do refer back to them. However, if I see another contrived example of using Entity Framework with a few wizards to whip out a solution I’ll scream. Smile
This application will be built with NET 4.0 using the following tools and technologies:
  1. Visual Studio 2010 with NuGet package support
  2. ASP.NET MVC 3 and Razor view engine
  3. Persistence layer will be:
    1. NHibernate 3.1 with SQLite
    2. Entity Framework 4.1 with SQL Server CE 4.0
  4. Ninject 2.2 for dependency injection
  5. xUnit for unit testing
  6. jQuery UI for user experience.
Here are links to the posts for this project:
  1. Domain Model
  2. Persistence
  3. Fake Repository
  4. ASP.NET MVC 3 UI
    1. Scaffold People CRUD
    2. Replace EF hard wiring with Repository pattern
  5. MVC Controller Unit Tests
  6. Enabling jQuery UI
  7. NHibernate Repository
    1. IDbSession and implementation
    2. Fluent NHibernate mapping
    3. NHibernate Unit Testing
As this series is developed, I’ll keep updating this post with new links.

Saturday, October 16, 2010

MacPorts - a slick system for easily installing OSS

It's been a month since I moved from a Windows-based laptop to a MacBook Pro and I'm just now getting around to playing with development toys..err, tools. First order of business was to grab Ant and Maven. Knowing that OS X is built around Linux meant it should be pretty easy. Of course, nothing ever is and it turns out there's lots of advice going back several years in the 'Verse. After seeing several references to MacPorts (formerly DarwinPorts) I checked it out. In a matter of minutes I had the two projects installed, configured and running.

Want to install Tomcat? It's as simple as...
$ port list tomcat*
tomcat-native  @1.1.20  java/tomcat-native
tomcat5        @5.5.25  java/tomcat5
tomcat6        @6.0.29  java/tomcat6


sudo port install tomcat6

Voila. There's 7,434 ports available at this time.

Powered by Qumana

Monday, September 6, 2010

A nasty OpenSSO configurator “bug”

After lots of trial ‘n error, I found that when configuring a new, first instance you must use the FQDN when launching the configurator. In addition, your machine’s hostname must be in a FQDN with AT LEAST TWO DOTS in the name. The only reference I found on the web was buried in this thread that’s two years old: http://markmail.org/message/35rfpbayvrjzjuvg. Also in the thread is mention that the default linux machine name of ‘localhost.localdomain’ isn’t supported and doesn’t work. What drives you crazy is the only error you see either through the JSP-based GUI or through the command line tool is “invalid hostname”.

Sunday, February 21, 2010

Anatomy of a Drupal-based Home Page

Technorati Tags:
home-page We are close to launching our re-designed website for the church I attend. To gain a bunch of functionality and enable easier updating we picked the Drupal CMS as a framework. The past three months have been a journey of discovery into its features that is reflected in our home page shown on the right.
The default Navigation menu has been enhanced by including the Nice Menus module. This gives us cascading sub-menus for “free” by simply installing and configuring the module. You simply need to edit the left-sidebar block and replace the Navigation block with the Nice Menu module then choose “Configure” next to the Nice Menu and select the <Navigation> menu as its Source Menu Tree.
We used the Simple News module to handle weekly emails and exposed it as a block shown on the lower left. Simple News enables user-controlled subscriptions and handles batched sending from the web server. Previously our administrative assistant used Outlook and had to divvy up the distribution list into several chunks to stay beneath her email host’s restrictions for bulk emails. Now it happens “magically” using cron features on the server – a fire-and-forget approach.
home-page-content The main content area started out as a simple Page node-type however we wanted more granular control of the content layout so we added Panels. Originally we had a welcome message followed by the photos/writeups of our two locations and the two Views blocks for announcements and upcoming events at the bottom of the content area. As the page evolved, we decided that the announcements and upcoming events should be more prominently displayed between the two content areas. We also wanted to insert a flash video welcome message from our pastor between the two sections as well. One approach would have been to resort to coding a custom theme template peppered with PHP code however that would’ve limited its use and updating to…well, just me! By using Panels I was able to layout the page into four main sections and make it accessible to others right from the website without resorting to hand-editing files on the web server as shown below:
panel-content
Notice that the two middle sections use Views as their content source. So far, the only coding I’ve had to do is a custom installation script for deployment to the live server and a custom theme for the sermons page. Drupal is impressive for the amount of features and maturity of the package that enables complex sites to be built with very little coding – all for the price of $0 and a little time and effort!

Friday, February 19, 2010

Comparison of LAMP settings across Linux distros

I’ve been using SUSE quite a bit lately and before this current job it was CentOS (a.k.a. RedHat) all the time. With my recent adoption of Drupal for our church’s website I also found myself playing around with WAMP as well. There are plenty of HOWTOs on each distro as well as forums and discussion threads that answer specific questions on where things are located, defaults, commands for restarts, etc. but I haven’t come across a simple comparison chart so here’s my attempt:

  CentOS 5.3 SUSE 11.2 WAMP 2.0c
Apache ver. 2.2.3 2.2.1.13 2.2.8
http.conf /etc/httpd/conf/httpd.conf /etc/apache2/httpd.conf
/etc/sysconfig/apache2
C:\wamp\bin\apache\apache2.2.8\conf
Apache commands apachectl  start|stop|restart|status
/etc/init.d/apache2 start|stop|restart|status
rcapache2  start|stop|restart|status
/etc/init.d/apache2start|stop|restart|status
{use tray applet}
Apache docRoot   /srv/www/htdocs C:\wamp\www
MySQL ver. 5.0.77 5.1.36 5.0.51b
PHP 5 ver. 5.2.9 5.3.0 5.2.6
php.ini /etc/php.ini /etc/php5/apache2/php.ini C:\wamp\bin\apache\apache2.2.8\bin

Thursday, February 18, 2010

Basic, Essential Drupal Modules

Technorati Tags:

Today’s post will cover some basic, essential modules that are generally recognized as “required” for most types of projects. Having worked previously with other packages such as DotNetNuke, I’ve learned that the Drupal core team takes a different approach – probably due to its Unix heritage. For example, DNN comes out of the box with a membership profile system built in which means all sites get this whether they need it or not. Drupal core offers a basic user profile for registering users (i.e. username, password, email) and nothing more. There’s also a core “Contact” module that allows you to add additional fields, photo, etc. However, you need not install or configure this unless you want the added functionality.

While it is possible to find or build a large, full featured module containing a lot of functionality the tendency with Drupal is to compose features using smaller modules that serve a single purpose like the canonical Unix “pipe”. In this way your installation contains exactly the features you need and nothing more. One such module is the Content Construction Kit or CCK which allows you to define new fields and attach them to “nodes” which are the generic, published content your site uses. Like the “pipe” it is a simple module on the surface yet the possibilities are limitless – you can define and build an entire site schema representing all the “things” (objects, entities, content) you need to store and display. CCK also recognizes and supports the “Advanced Help” module to give administrators more in depth help if it is installed. Views is another module that goes hand-in-hand with CCK and allows you to build queries to generate pages, blocks, feeds, etc.

Here’s my list of the basic, essential Drupal modules, as of 6.x:

CCK The Content Construction Kit allows you to add custom fields to nodes using a web browser.
Calendar This module will display any Views date field in calendar formats, including CCK date fields, node created or updated dates, etc. Switch between year, month, and day views. Back and next navigation is provided for all views.
Date This package contains both the Date module and a Date API module. The Date API is available to be used by other modules and is not dependent on having CCK installed. The date module is a flexible date/time field type for the cck content module which requires the CCK content.module and the Date API module.
Demo This module allows you to take snapshots of your site. It turns a Drupal installation into a sandbox that you can use either for testing modules or setting up a public demonstration site for a module / extension / theme (you name it). Whenever you need to reset your site to a saved state a click of your mouse will do so. With cron enabled, a Drupal site can be automatically reset to a chosen snapshot in a definable interval.
Image This module allows users with proper permissions to upload images into Drupal. Thumbnails and additional sizes are created automatically. Images could be posted individually to the front page, included in stories or grouped in galleries.
IMCE IMCE is an image/file uploader and browser that supports personal directories and quota. Since its first release, IMCE has been used as a file browser in many popular rich text editors such as FCKEditor, TinyMCE, WYMEditor etc.
jquery_ui A wrapper module around the jQuery UI  effects library that lets module developers add swooshy, swishy effects to their code...This is a utility module that won't do anything on its own. See README.txt for how your module can use it to add jQuery UI effects to your pages.
Node Export The export module allows users to export an existing node and then import it into another Drupal installation. The idea is similar to the way you export/import Views or Content Types.
Views The Views module provides a flexible method for Drupal site designers to control how lists and tables of content (nodes in Views 1, almost anything in Views 2) are presented.
Wysiwyg Wysiwyg module allows you to use client-side editors (a.k.a. WYSIWYG editors) to edit content in Drupal. It simplifies installation and integration of editors and allows to assign an editor to each input format. Wysiwyg module replaces all other editor integration modules and no other Drupal module is required.

NOTE: The above descriptions were not authored by me – I simply pasted them from their respective project pages which each module above links to.

The nice thing about the modular approach is that you can skip the modules you don’t need. Not going to allow folks to do rich-text, HTML-savvy editing? Don’t include Wysiwig or IMCE! Prefer a different tool for the job? Use it instead!